Play by play, pattern by pattern: How I structure a typical sequence to guide beginner learners to a high level of fluency.

Blog aim
In the past I have shared resources, blogs and student work based on my implementation of Extensive Processing Instruction (henceforth E.P.I.) Part of the response to this sharing of (what I consider to be) good practice is that colleagues have asked for a typical sequence of go to lessons and activities. In this blog, I outline all the activities I typically use, as well as the order I would do them in, and the rationale for using each activity, both in that particular order, and for using it at all.
Background
I have been using E.P.I. full time for three years now. I consider myself lucky to have worked alongside Dr Conti while he was developing the methodology and contributing to the creation of the same. I remember both vividly and with fondness our conversations on how to come up with a system that allows students to make best progress, based around the research on cognitive load, forgetting rates, and phonological constraints on working memory.
What am I trying to achieve in my lessons?
Aim 1) Real world, real time fluency
My aim is to create confident linguists who are able to speak/write with fluency and who are also passionate about the target language culture. Fluency is defined as : “the ability to speak or write a language easily, well, and quickly” (Cambridge Online Dictionary). To this end, to achieve fluency in any given topic a speaker needs to be able to interact with a certain lexical item (a word, a part of a word, or a string of words) in real time and in a variety of contexts. Personally, within the context of Spanish I put a lot of emphasis on the “quickly” part of fluency, with a lot of exercises having a clear and explicit focus on building speed of production, both recall and actual talking speed.
Aim 2) Fluency and cultural awareness
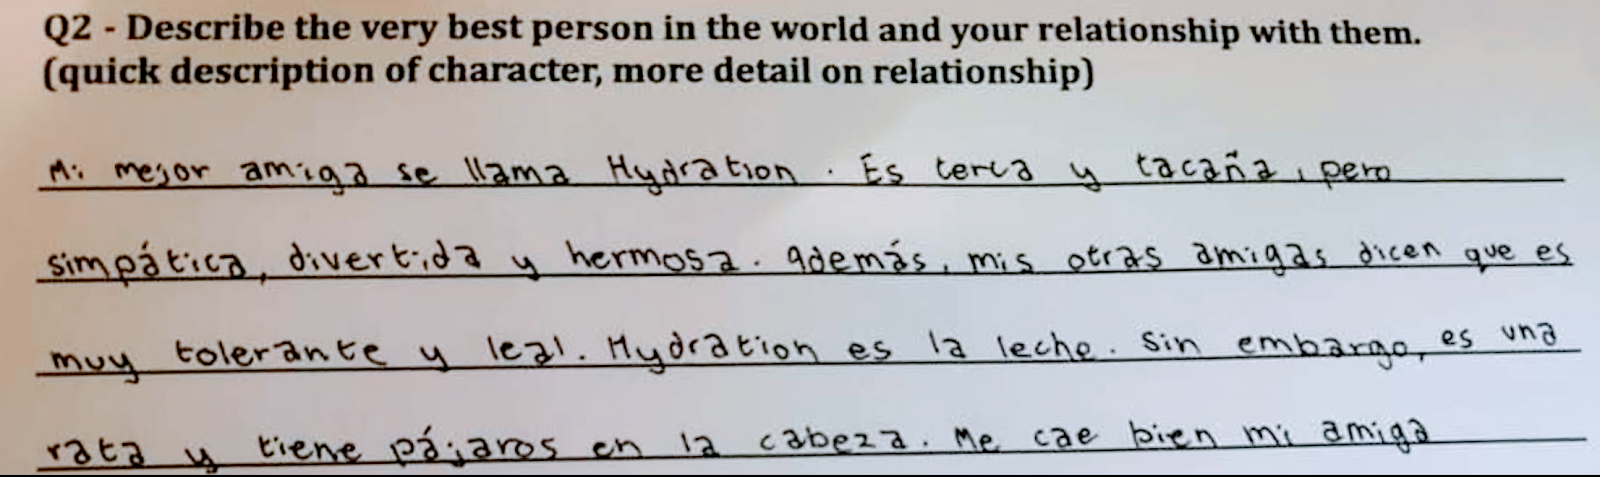
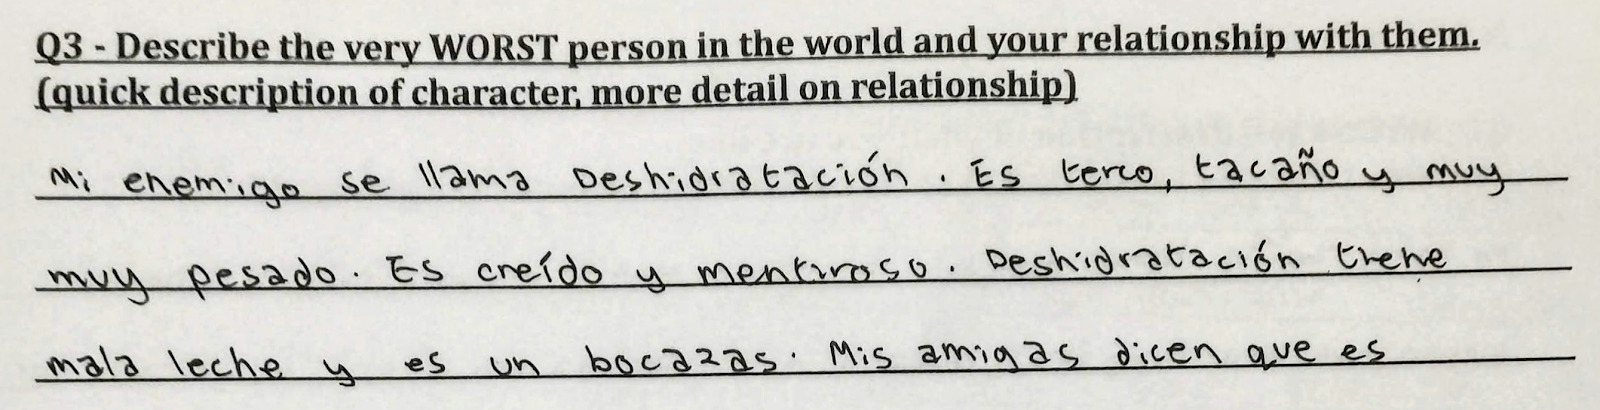
When can a word like “beach” be deemed to be fully assimilated? It is when a student can translate “la playa” into “beach”? Arguably, for the sake of fluency, we want students to be able to understand and use it in different contexts : “I went to the beach”, “I prefer the beach to the countryside”, “the beach is always hot”, and even in an idiomatic use, “life’s a beach”. A Spanish example of this would be usage of ‘leche’. It means milk, but is also used to mean ‘awesome’ in Spanish slang and appears in other idioms too.
Ideally, by the time my students get to the end of KS3 they will be confident in “bebo leche” (I drink milk) as well as the idiomatic usage “mi amiga es la leche” (my friend is awesome).
Aim 3) Long term retention
The other main aim is for all of the above, the fluency and the bits of cultural knowledge and understanding to be long lasting; avoiding the perennial issue of students forgetting, and then having to spend time relearning old material as opposed to moving on to new content. Or at worst, students losing motivation and being reticent to relearn past lexical items, or even whole topics. To overcome this issue, I design the curriculum so we spend longer on each topic (about one big topic per term), and programme the topics so they appear in logical order and so that content is interleaved and recycled at regular intervals.
My Typical E.P.I. Sequence
Below I will describe how I would order a sequence and the rationale behind this within the E.P.I framework. For the purpose of this blog, I will describe my approach to a Y7 beginner class. For more advanced groups, you can pick which steps, if any, to skip.
Sequence Summary
The sequence described below is largely based on the MARS EARS approach, with a few of my own twists. It is made up of the following points:
Prior to beginning the sequence
Starting Point 1) Create/source a Sentence Builder + Give it to students
The Sequence (summarised)
1) Modelling and Sensitising – Phonology
2) Modelling / Sensitising – Working on meaning
3) Awareness Raising (And how it fits into Lexicogrammar…)
4) Receptive processing / Structured Production
5) Expansion/Autonomy
6) Routinisation
7) Spontaneity
For each of the points there are a list of my (go to) most successful activities.
Pre-Sequence:
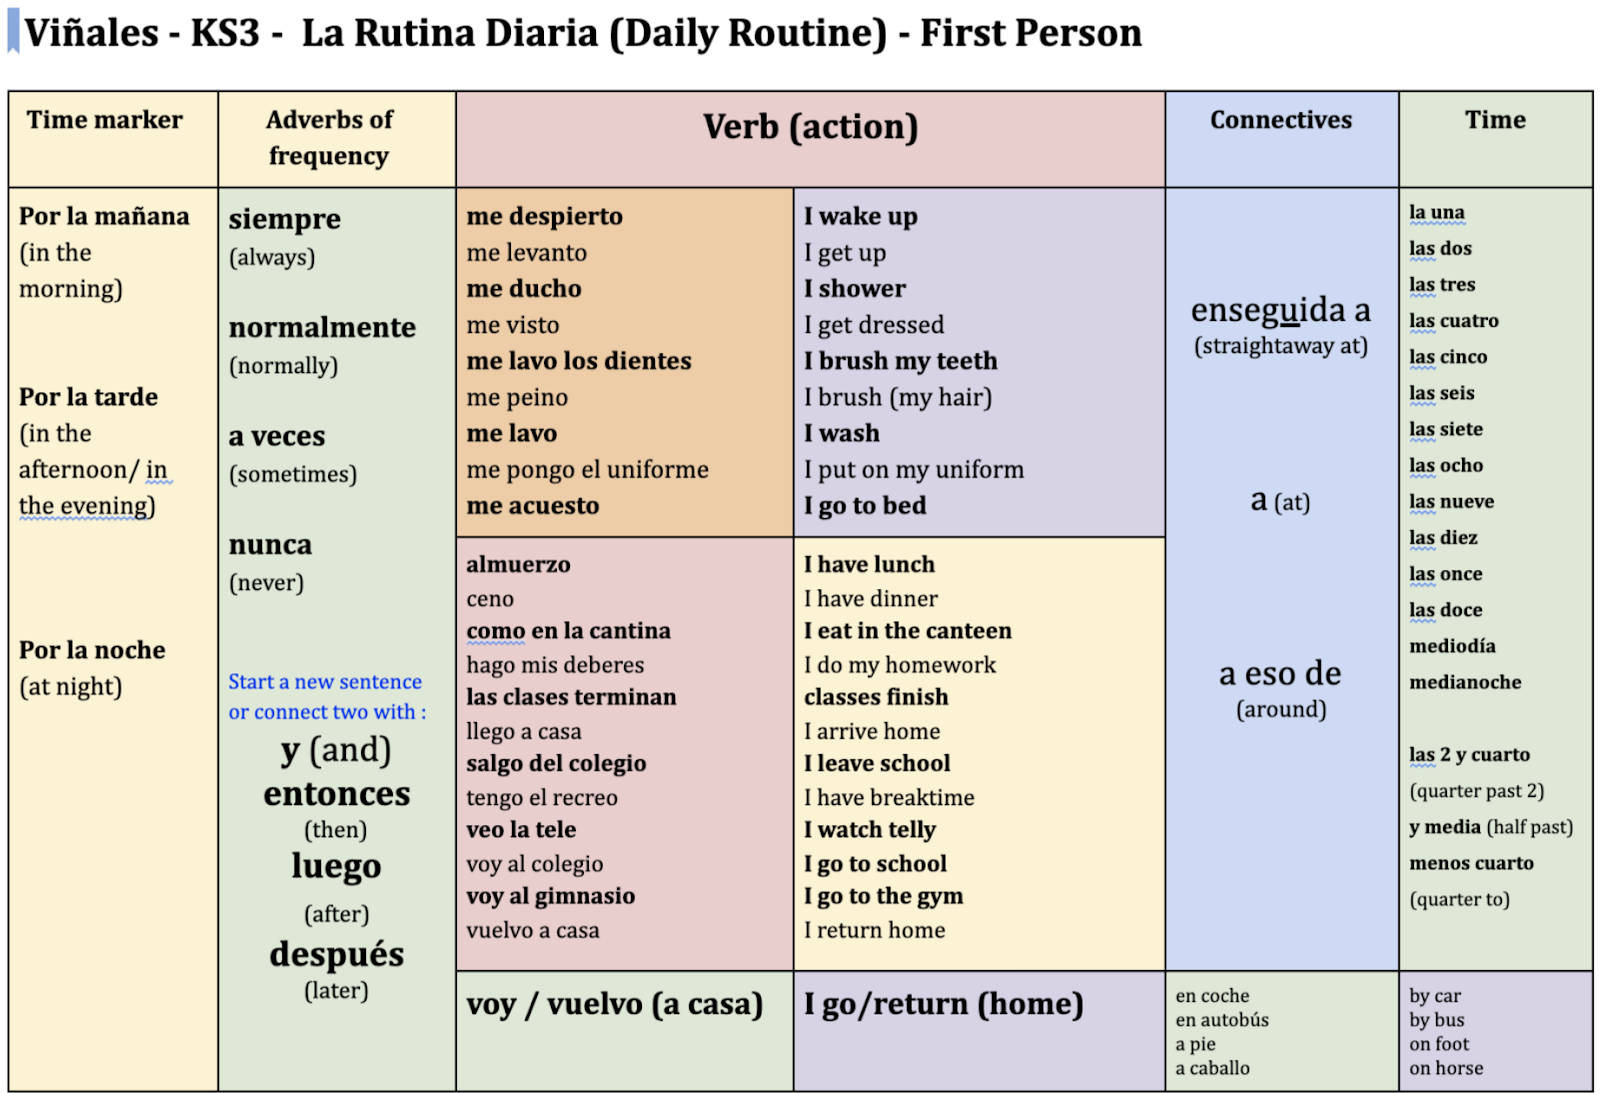
Create/source a Sentence Builder.
Sentence Builders are essential material for us in my department as we do not have a course book until KS5. You can purchase these or make your own. For a detailed guide on how I design Sentence Builders in a way which benefits students of all levels (weaker, middle and stronger), and more about the rationale behind this system/format for presenting information see an earlier blog I wrote here : Three Top Tips On How To Make Sentence Builders To Help All Students Progress.
Give the Sentence Builder to the students.
I am lucky to have the choice to share the Sentence Builder electronically, via Google Classroom, or to print it out and share it physically. Given this choice, I nearly always go the paper-free way and share via the classroom. If printing, I recommend removing all colours and just going for a plain black and white version.
Step 1) Modelling and Sensitising – Phonology
Phonology and Pronunciation
The first priority for me is to familiarise students with the language in the new unit. Within this, my first focus is on sounds/phonology. In the case of a beginner class, I know they will not be confident about how to pronounce certain key sounds in Spanish like “g/j/ll/h” therefore I will usually go through the following steps.
1. Call and response, varying speeds and tonality. Single words or chunks – little to no focus on meaning, just phonology.
2. Call and response, varying size of chunk. For this, you can make a zero-prep tongue twister by combining items from the SB. As above, no real focus on meaning yet, just phonology.
E.g. Me: “Almuerzo”
S : “Almuerzo”
Me: “Almuerzo Como”
S : “Almuerzo como”
Me: “Almuerzo como como en la cantina…” etc
Then, as above, but with an increasing list size until students start to become overloaded. Working with the items in the same order they appear reduces cognitive load – the focus here is on phonology, not memory per sé.
3. Pushed Output. Ask students to tell their neighbour how to say a particular word, which I point at on the projected Sentence Builder. “¿Cómo se dice ‘ésta’ palabra?” Student quietly pronounces word for their neighbour. At this stage I am working on getting students to practise the sounds and raising awareness about different sounds.
4. Semi-independent production. Ask students to work in pairs or groups of three read out a section of the Sentence Builder, or a set of prepared sentences from the Sentence Builder. This is low-risk reading practice and a chance for them to have a go at independent pronunciation without the whole class listening. In their group, the person or people listening are tasked with giving feedback on any sounds that have been mispronounced.
During this activity I walk around the room and listen for mispronunciations. If a sound is still causing widespread difficulty, I will make a note and then go back to steps 1) and 2) above to work on it as a class.
5. Faulty Echo – A Contian favourite involved reading out a sentence correctly, and then repeating it but with an added mistake. Students have to identify the mistake.
E.g. Good Me: “Mi persona favorita en el mundo es mi hermano” (correctly, with silent H)
Faulty Echo Me: As above, but with a guttural HHH on ‘hermano”
Student (*snickers* then writes on mini white board): “Hermano”
Students love this activity. I love this activity. The next stage for me, once students are getting the hang of things is to just say one sentence, and include an error into it – students have to directly identify the error.
Step 2) Modelling / Sensitising – Working on meaning
Once students are warmed-up and quite confident with how words are pronounced we move on to some games focusing on meaning. The aim here is to flood students with examples of how the language in the sentence builder can be put into practice. There is a set routine that I follow, although the games themselves vary (to keep things fresh for everyone).
1. Zero Prep Listening : Finish my word – this is still a sound sensitisation technique, but that works on meaning and on the initial creation of a roadmap of chunks within the long-term memory.
E.g. Me (in Spanish) : “Todos los días me despierto a las sei…..” (Every morning I wake up at si…….”)
S (writes on mini white board) : “s”
Our aim, as discussed is to make fluent, fast thinking, speakers. So I employ the following adaptations to try and meet that goal:
Adaptation 1. Increase speed of chunk. Once they have heard the “Todos los días me despierto a las…” structure a few times and it looks like everyone is coping well, I start increasing the speed until I reach a near native pace. Because they are only required to finish a syllable at the end of the word, I am focusing the majority of their available working memory on comprehension and only placing small constraints on the production side. This makes the activity doable, and success is key for their self-efficacy, which is key for everything, basically.
On the contrary, if I gave them a really quick sentence and required them to very quickly access a whole word and then write it down correctly, there would be too many functions going on, cognitive overload would occur and many students would crash and burn.
Adaptation 2. Increase length of chunk and add distractors. Instead of just one sentence, make your output longer. Stay within the Sentence Builder and within the 95% Comprehensible Input zone, or venture out for a bit and then come back in.
E.g. Me: “Por la mañana siempre me despierto a las seis y luego me levanto. Mi hermano se llama Paco y siempre se levanta a las siete. ¡Mi hermano es muy estúpido! En fin, finalmente, por la mañana a las nueve salgo de ca…”
(In the morning I always wake up at six and then I get up. My brother is called Paco and he always gets up at seven. My brother is very dumb! Anyway, finally, in the morning at nine I leave the hou…)
Sorry brother Paco! Got you again. The idea here is that I have added in a couple of distractor sentences so students are presented with a bit of a challenge if they are going to keep up throughout the whole text. I am also planting some seeds and giving early exposure to the next linguistic focus – third person daily routine.
Adaptation 3. Increase length of chunk and add ‘false endings’
E.g. Me: Todos los días me despierto a las seis y después me lev…….
S (starts writing on MWB): “anto”
Me (carries on speaking – some mild cursing in background): …anto y después desayuno con mi hermano. Finalmente salgo de casa y voy al colegio en co…
S: “che”
In this game, which I don’t ever announce, but just do as a natural extension (and a bit of a prank), I find one of the highest levels of engagement and focus of any activity.
The stakes are very low. Students only have to write down 2-4 letters at any given time and the game resets with every new sentence. This is great as weaker or slower students are constantly back in the game, as opposed to a more traditional dictation task where, if you fall behind it becomes impossible to catch up. With this game, anyone can win, and when your weaker students succeed, it’s a very easy and genuine scenario to be able to load them with praise. I.E “Anddddd the fastest ever person ever of this round was….. COLIN!!” Powerful stuff for getting students on board, and a good self-efficacy boost too.
2. Zero Prep Listening : Finish my sentence – this technique works on listening for meaning. Essentially, say the beginning of a sentence and then students finish your sentence with a logical word
Adaptations: As above, you can vary sentence lengths and add distractors. For added complexity, you could also make sentences that require a particular agreement (e.g. mi hermana es… “simpática” etc)
For more details on my other go to listening exercises, and the rationale behind why I value then, see my last blog on: Creating Enjoyable Listening Lessons In The Mfl Classroom – A Practical Guide.
Step 3) Awareness Raising
And how it fits into Lexicogrammar…
Lexicogrammar = the notion that grammar is an integral, non-separable part of language.
Awareness Raising = highlighting grammar issues / making students aware of important linguistic features.
The E.P.I. methodology does not encourage an explicit focus on grammar as the starting point to any sequence of learning. In turn, this has at times been interpreted as “there is no grammar instruction” at all in E.P.I. This is not the case. E.P.I. advocates a “Patterns First” (also the title of Part 1 of Dr Conti’s blog on Lexicogrammar – linked throughout this blog) approach. In other words, allow students to become familiar with the language patterns and structures and then work backwards from there.
For example, once students have been flooded with, and had some experience of producing structures such as “Cuando era pequeño/a vivía en España y siempre jugaba al tenis con mis amigos” (When I was young I used to live in Spain and I always played tennis with my friends) this is a good time to look into the grammar behind the imperfect tense, either inductively (students working out the rules for themselves based on the examples provided) or deductively (teacher explaining the rules and giving examples etc).
The awareness raising and receptive processing strands of the methodology are a good time to mention, or raise awareness about, some of the linguistic items being covered. My main focus, nonetheless, remains practice makes perfect. For example, in my Sentence Builders, I specify, as a non-negotiable that it is impossible to make a wrong combination (see some of the exemplar SBs on my TES area for examples), therefore I address masculine/feminine agreement in the following way:
I stand in front of the following two Sentence Builders and ask students to work in pairs to work out the differences and the logic behind the black/blue colour coding


They quickly come up with the following:
– Feminine/masculine adjectives end in an “A”/”O”
– “encantador” which ends in an “R” gains an “A” in feminine
– The Physical and Character Descriptions (adjectives) in blue are the same in both masculine and feminine.
The end. That’s it for now. I’m happy to have raised awareness, but I want to get back to flooding them with comprehensible input, and playing loads of receptive processing / structured production games where students are producing correct language. When they eventually write a text (or prepare a speech, or just talk) autonomously, they hardly ever make any agreement errors because they’ve been flooded with correct language and I’ve directed girls to use the female sentence builder, and boys to use the male one. Why fossilise incorrect language when you can be flooding correct language?
Step 4) Receptive processing / Structured Production
Receptive Processing = providing a flood of input so students see structures multiple times, such that these start to be assimilated.
Structured Production = where students produce the language in a structured and safe context.
For the next part of the sequence: receptive processing/structured production, my go tos are:
1. Delayed Copying – I don’t leave home without it. This staple requires students to see a sentence which then disappears, and then copy down what they’ve seen – Target Language to Target Language.
The rationale behind this activity ties into students having to successfully store lexical items in their phonological loops (the part within working memory where sound is stored, in a loop). This phonological loop is one of our most unstable and evolutionary rubbish resources (sorry humans!) so we are required to focus 100% on the task at hand in order to not forget the item. The advantage though is that we are forced into serious amounts of repetition if we want to succeed, and this is one key way of having items enter the long term memory – so we’re tricking students into memorising information while they think they’re just playing an exciting game.
For a free template/exemplar – click here. Mine is very basic, but I’ve seen some really cool ones with a ‘beat the mouse/rat’ game element to it. I personally prefer a basic one as I have full autonomy of how long to show an item before I remove it (and whether to give students a “bonus ‘second’ peek”).
2. Disappearing Text – I do this on the back of Delayed Copying, usually with the same, but slightly modified sentences. This activity also requires memorisation and focus. I run this as a speaking though. Students are shown sentences in which letters progressively disappear. They are required to be able to read out sentences correctly despite the missing letters.
3. Algo Game – This is a paired information gap-fill whose name I coined after the fact that when I play it, I ask students to say ‘algo’ which means ‘something’ in Spanish, whenever they get to a gap. It is referenced in the the latest Conti/Smith bestseller ‘Breaking the Sound Barrier’. While the name “Algo Game” is new, information gap fills themselves are not and have been around, in different shapes and sizes since as far back as the 70s. For more info about this activity check out Steve’s blog: Paired listening gap-fill (Steve Smith – Language Teacher Toolkit)
4. Narrow reading – I come up with a text using items from the Sentence Builder (always with the 95% comprehensible input mark in mind). I then copy that text, making a few changes, but keeping the same structures that I am trying to flood. I do this again until I have a set of four or five texts. At this point I run these texts through Martin Lapworth’s Textivate.com and create a sequence of activities. Please note that Textivate is a paid resource.
My top 5 Textivate activities are:
a) ‘Gap fill’ – usually custom made, where I choose what gaps I want in my text. This is only slightly slower than just choosing random words but loads better because you can choose to take out verbs/adjectives or whatever you want. You can also put in some tricky distractors (simpático, where the real answer needs to be simpática – devious!) and also, some hilarious distractors (a random word like “elefante” for no reason at all other than to keep things interesting).
b) ‘Tile organiser’ – students need to reorganise the text into the correct order
c) ‘Millionaire’ – students need to choose the next sentence
d) ‘Find the next word/chunk’ – self explanatory
e) ‘Football game’ – students need to choose the correct word in order to not lose their turn and be able to pass or shoot. Some of the most retro graphics and game play out there, but a student favourite.
Narrow Reading is an excellent example of thorough processing. It is the opposite of the more conventional, textbook approach where students answer a few quick questions on a text and then move on (having only skimmed the text to glean the specific information required). Texts need to be exploited at all levels of grain for ‘noticing’ to occur. This is why successful narrow reading exercises focus on spelling, lexis, grammar and eventually meaning and discourse building. Thorough processing of texts is an essential tool in the passage from receptive processing to structured production.
Step 5) Expansion & Autonomy
Unpicking the grammar & The road to Independent Production
Expansion = expanding upon the grammar modelled thus far (like a normal grammar lesson, basically, but done near the end of a sequence, not at the beginning).
If the Sentence Builder has focused on 1st or 3rd persons of the past preterite tense, in the Expansion phase, students will be taught, inductively (student-led) or deductively (teacher-led) about all other persons of the verb, for example.
Autonomy = checking if students can retrieve the language without a Sentence Builder (this would be a good time for an assessment, if you wanted to.)
By the time we get this far, students are now ready to start producing language with more autonomy. The big advantage of waiting this long (about two to three weeks at least) before getting them to start showing some creativity and independence is that by this point, the students are likely to be able to produce a base of correct, high level language (the Sentence Builder is the limit of my world).
At this stage, two very low prep activities that are of particular benefit to students are:
1. 4-3-2 speaking (students can use Sentence Builder to prepare)
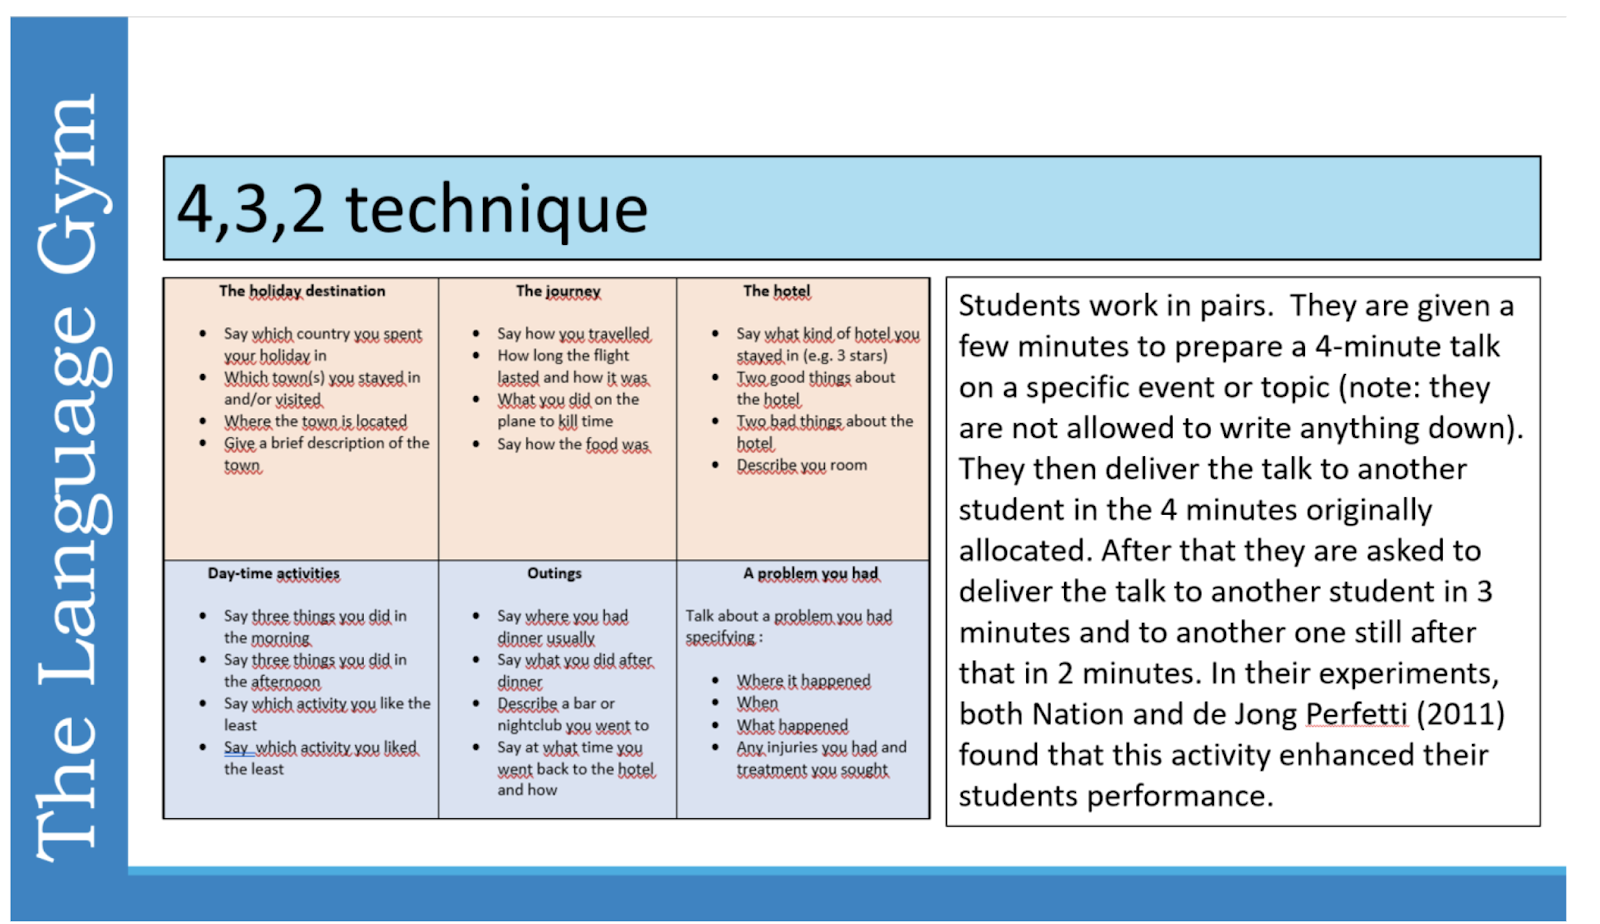
This is a really useful activity. For younger groups I sometimes adapt it to 3,2,90secs. It is useful to place students in groups of 3 and then have two students give feedback after each round. In my experience, students, when given the right support and guidance, can give accuracy and honest feedback to each other. By the end of the process, students always recognise their fluency gains and are aware of next steps to improve.
2) Group writing – I make a shared Google Document and get students to work in groups of about 4 students (so 4-5 separate groups on different pages of the same doc if a class size of 15 -20). Students then write their answers to a set of stimulus, which I write on the board, or within the same doc. If you were doing this non-electronically, you could use a visualiser to show students work and discuss good practice / errors, in addition to students looking at what others in their group are writing.
I find this advantageous because students can see what a small group of peers is writing, thus they can cross-reference for accuracy. It is a preferred model for me as a stepping stone to totally independent writing.
At this stage, I accept questions from students looking to expand outside the Sentence Builder and either directly help them or direct them to Wordreference.com or other resources.
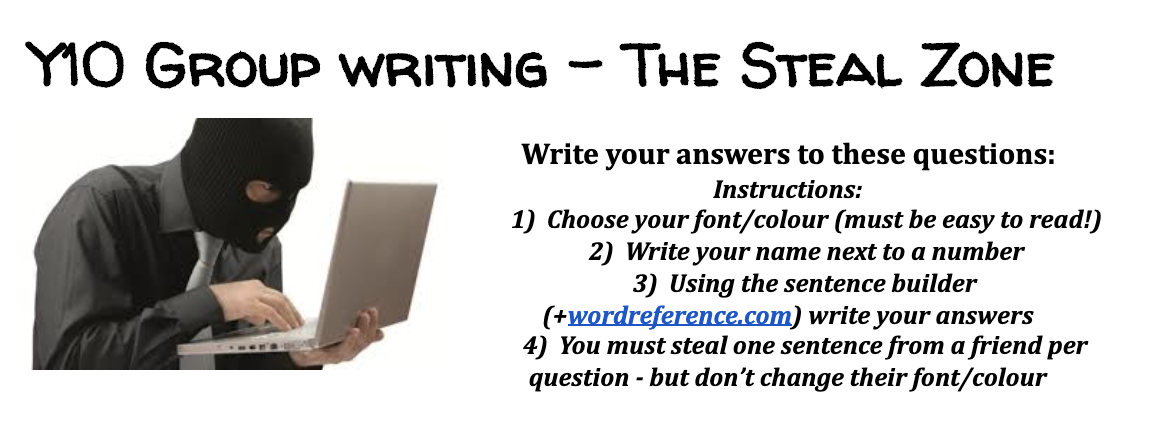
Adaptation 1 : The Steal Zone. As above but students are encouraged to copy good language from their peers. This works best when working online, but could potentially also work offline, although the copying would be more time consuming.
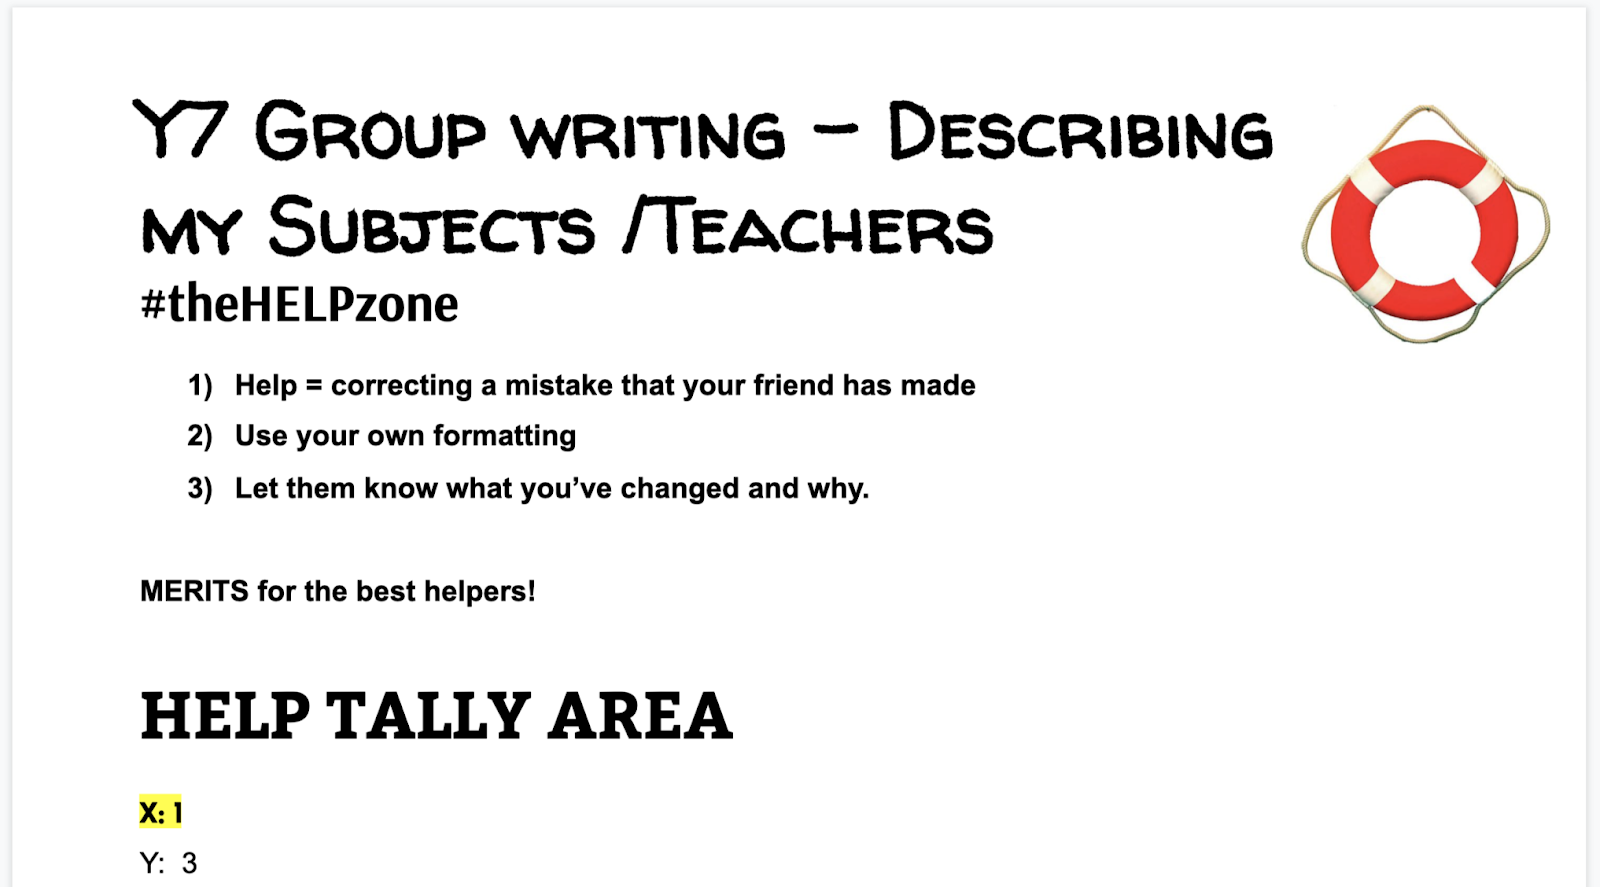
Adaptation 2 : The Help Zone. As per regular activity, but students are rewarded if they can spot and correct any errors (typos / adjective errors / errors as a result of moving away from the Sentence Builder) their friends have made. This last adaptation could equally be done ‘offline’ by getting students to share their work and do some peer reviewing.
Step 6) Routinisation
Routinisation = Building up speed for REAL LIFE usage
The idea here is to increase retrieval speed and avoid excessive forgetting by students by planning opportunities for regular recycling. Thus the language becomes routinely used.
The routinisation phase will occur near the end of a unit of work, the last 5-6 or ideally more lessons at the end of term, when, having learnt all the target chunks and grammar structures practised thus far, the students are finally having a go at using language for what it should be used: real life communication. In this phase you would stage tasks involving production under time constraints and repetition.
Some useful activities here are:
4-3-2 Speaking (as mentioned above, but with no scaffold this time)
Timed translations
Speed dating
Step 7) Spontaneity
This is the final stage of the E.P.I. sequence. Ideally, by the time you have been through the steps above, from modelling and awareness raising through to structured and independent production, students will have become confident in the language patterns and content. At this point the aim is to “test” the students fluency. Why “test”? Because I do not really want to give them a test, in the traditional sense of the word.
Traditional test = memorise for a specific predictable stimulus. Spend a long time memorising some text. Reproduce the text. Win/lose.
Please note: I might still get students to write an essay, or do a translation, or recite a speech, at the very very end of the unit, but that’s a different story.
At this stage I would suggest giving students a task-based activity where they are forced to use the language learnt over the unit, but in a real-life scenario. Below is a screenshot of a recent Dr Conti post on the GILT Facebook group.

Some examples of task-based learning activities for end of unit checking on learning are ‘opinion-gap’ tasks (giving opinions based on stimulus), ‘reasoning-gap’ tasks (deriving information based on information provided), ‘information-gap’ tasks (decoding and transferring information from one person to another).
I will blog more about spontaneity at a later time.
Concluding thoughts
In this post I have detailed a typical sequence, as well as shared the activities that have proven to be most successful with my own students over the years. In addition, I have given, where possible, a rationale for each of the steps. The E.P.I. methodology has brought about several benefits for my students and my team – reduced time spent on error correction, student gains in fluency and long term retention and also increased take-up at IGCSE. I hope that some of what you have read will have been of use to you and can be implemented into your own practice. Thanks for reading!

Acknowledgement : For further detail on E.P.I. check out Dr Conti’s original blogs on E.P.I. / MARS EARS and Lexicogrammar – Part 1 and Part 2

Reblogged this on Y Byd a'r Betws – Blog B J Mock and commented:
EPI Sequence ideas. Superb post Dylan. Thank you for sharing.
LikeLiked by 1 person
I found the EPI very useful. Thanks Viñales.
Hopefully I will be able to use it in the future.
LikeLike
Really interested in applying this approach to our curriculum – do you spend a lesson on each step? Or longer? Do you then repeat the process with a new sentence builder and the same activities?
LikeLike
This was very useful. I’m hoping to implement this in my first role as head of department. Thank you
LikeLike
Merci, danke, gracias!!!!!
I have been reading and attending workshops for weeks now and this is the first clear, step by step guide for newbies I have found. Such a huge relief!
Thank you most sincerely!!!
LikeLike
Hola Kate, thanks for that feedback! Glad you found it useful! 👍❤️🐧🙏
LikeLike